My Quick HDR Method
From time to time I want to produce a number of HDR images very quickly, so this is how I do it. Before we start, let me state, with out question, that this is not the Jim Begley, R.C. Concepcion, Trey Ratcliff, or Tony Sweet method, all these great photographers are masters of HDR. This is the; I’m in a hurry, don’t have time for layers, and masks, just want it to look cool, and I need it now method!!!!
Here we go, step by step:
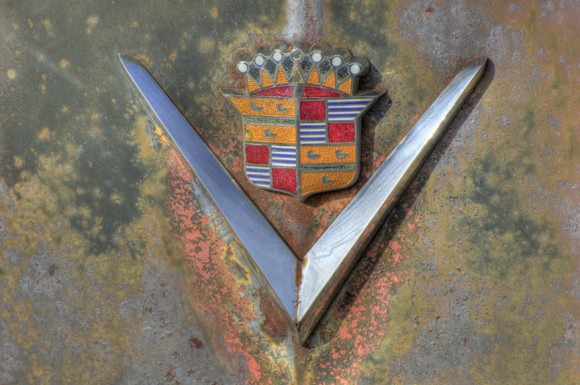
Step One I select a series of HDR exposures of the image I want to work on. This is a Cadillace logo on a car at Old Car City. Five shots one stop apart. Shot on a tripod.
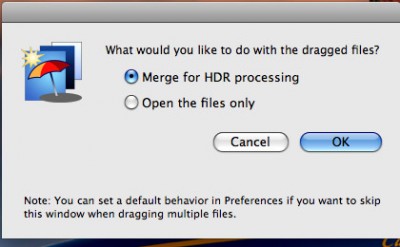
Step Two: I drop the files into Photomatix Pro and click OK that I want to make an HDR image by merging the images.
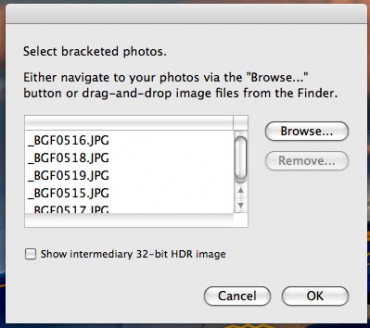
Step Three: Click OK that these are the five images I want to merge.
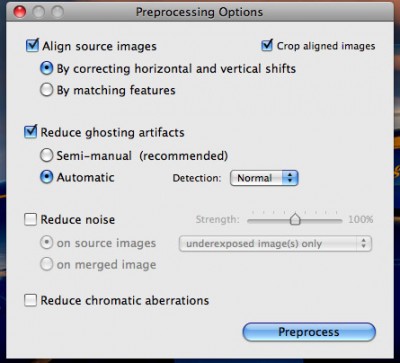
Step Four: Select Align Source Images as shown in the illustration below and Reduce Ghosting Artifacts/Automatic and then click PREPROCESS.
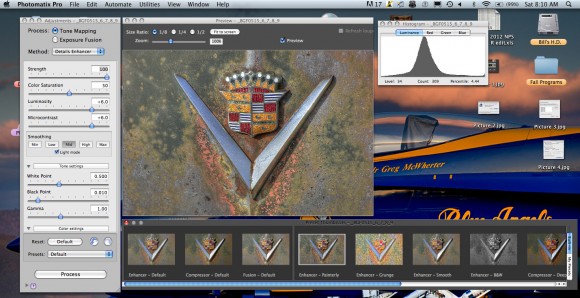
Step Five: This will bring up the preprocessed image and give you a series of choices for the effect you would like. I usually use Enhancer/Painterly, and then simply click PROCESS.
Step Six: This will yield a processed image, which is somewhat flat and washed out. It will look like the image below:
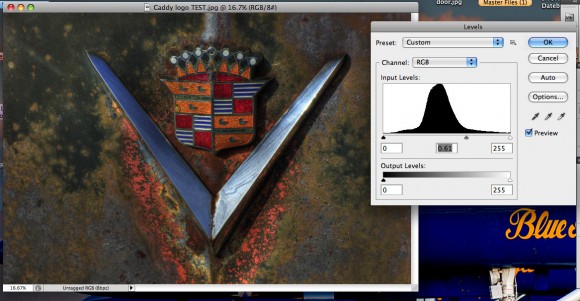
Step Seven: Now the image needs to have the contrast and saturation adjusted so I take it into Photoshop CS5 and use the middle slider (mid-point) to adjust the contrast and color depth to my taste. I move the slider to the right both darkening the image and increasing the contrast.
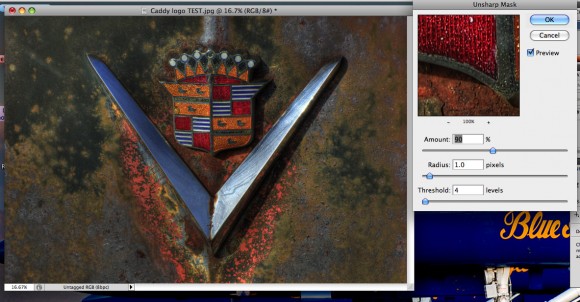
Step Eight: I now sharpen the image. I think sharpening is highly personal, you can see my settings below for this type of image. I experiment and then look at the image at 100% to get the most sharpening without adding artifacts or halos.
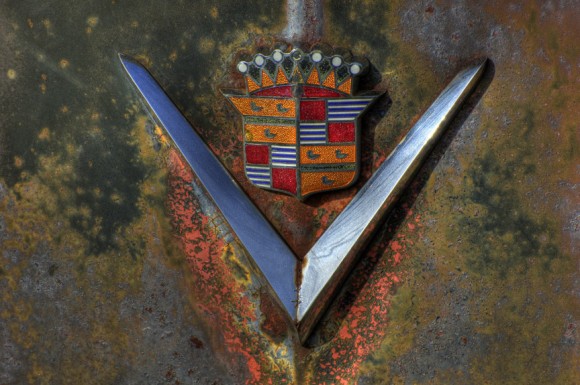
The final HDR image:
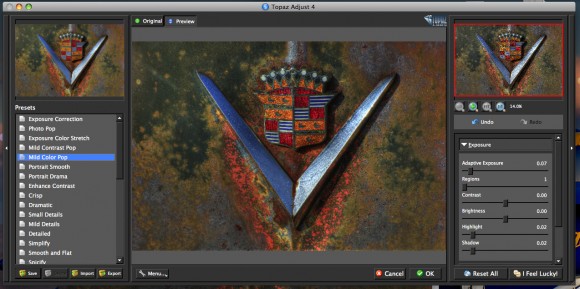
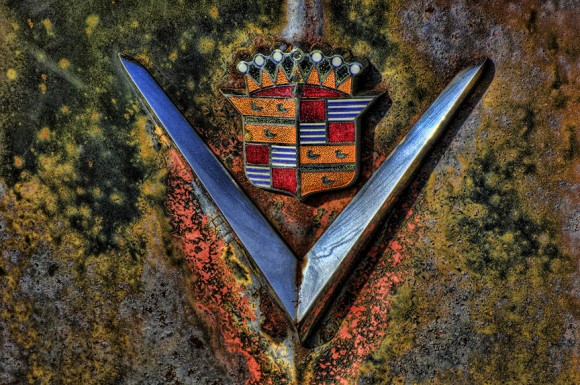
Sometimes I want to make the image look a little more grungy, depending on the subject, so if I do, I drop the image into Topaz Adjust and apply the Spicey Filter. ( I also use other filters as well but that is the one that usually give me the affect I want.)
Which gives you this final image:
So, the bottom line is, you can go through this entire process in about two and a half minutes depending on the speed of your computer. The results won’t match the careful results of my friend Jim Begley’s art, but they are pretty cool for such a fast, quick and dirty method! I also get great results from NIK HDR Efex Pro and in about the same amount of time.
If you’re a “reality based” based photographer, forgive me for even bringing this up!! If you don’t mind taking a few chances, and stretching your artistic juices, it can be a lot of fun and great way to breath life into old images……..
the pilgrim
This entry was posted on Saturday, December 17th, 2011 at 2:18 pm
You can follow any responses to this entry through the RSS 2.0 feed.


Hey Bill,
What camera and lens were you using for this post?
Mostly D7000, D3s and some of the various Coolpix cameras (P7100, P300 and the new Nikon 1)
Mostly D7000 and D3s, also some work with P7100, P300 and the Nikon 1.
Let me make sure I follow your words of praise and wisdom and don’t neglect to tell those I love that I truly feel that way. Bill, I love you like the brother you are. This world and my world are better paces to be because of you.
I feel the same about you guys, loving the wonderful music you sent me, thank you, and Merry Christmas! Are you coming to Old Car City??
As always you are too kind, but I love you to Jim, and Sue, I am looking forward to much fellowship in 2012, I hope you guys have a great Christmas and I hope you can make it down to Old Car City with us!
Thanks Bill. That was great!
Thank you Bill, I will be saving this page to my favorites for future reference. This is much appreciated. Have a very merry, Christ centered Christmas!