

Step by Step: How to Shoot an Image!
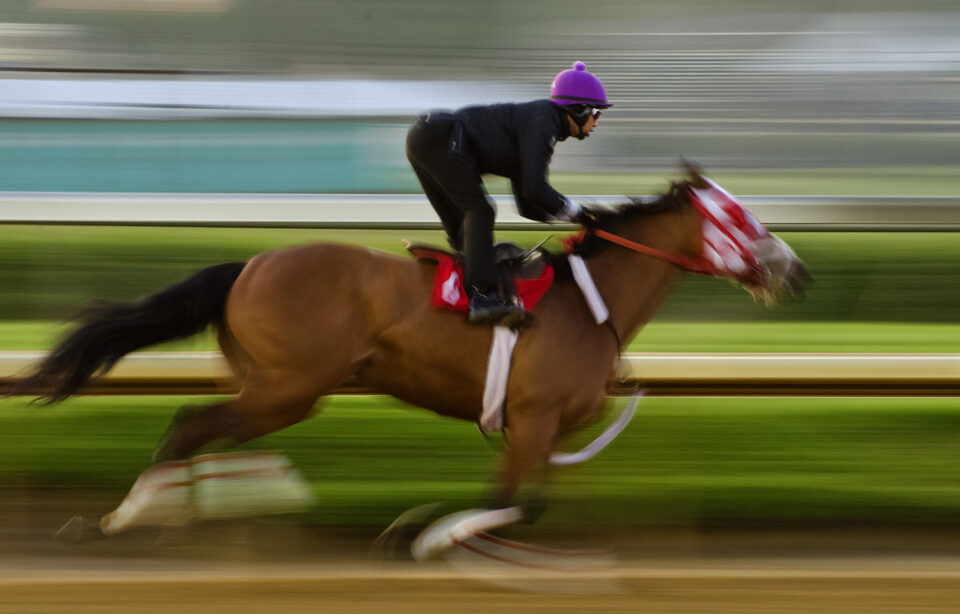
Image Number 1
I watched a youtube video by Andy Mumford last night and I was intrigued at how he explained camera settings. I really like his works and enjoyed the video but wanted to approach this from a slightly different angle!
This is my overall approach to shooting;
- I set my camera on Aperture Priority.
- i start with my ISO set to the base ISO for my Fujifilm X-T5 – that is 160. I only raise it if I need a higher shutter speed.
- I choose the lens that allows me to frame the subject most effectively.
- I choose the aperture setting that gives me the appropriate depth-of-field that I need.
- I pay close attention to good technique, tripod if needed, polarizer or other filter if needed, I fire the camera with the self timer to avoid camera shake.
Image Number 1 (above) I was shooting practice at Churchill Downs the morning before the Kentucky Derby. I wanted to show the illusion of motion so I choose an aperture that gave me a shutter speed of 1/2 of a second. Each time the horse and jockey came around the track in front of me, I panned and fired the shutter during the movement of the pan. It gave me the slightly blurred image that I think gives the feeling of movement.
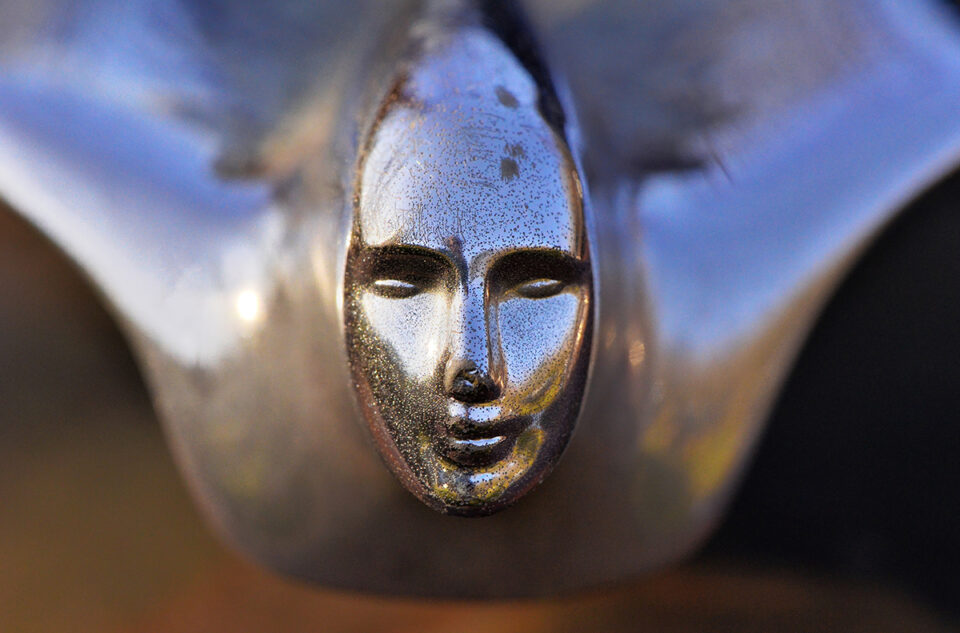
Image Number 2: While teaching a workshop in Old Car City in White, Georgia I found this hood ornament on a Cadillac. I wanted to feature just the face so I used the Fujifilm XF 60mm macro set at f11 and shot at 1/250th of a second. Even at F11 all that was in sharp focus was just the facial features allowing the background to go soft. it is still on of my favorite images. The light was slightly overcast which was perfect for this shot.


Image Number 3: While teaching a workshop in Nashville, I found this door decoration (top image), a man had welded a group of rusted tools together so I first shot the entire collection, then I started to zoom in an try to find a less cluttered composition and settled on the bottom shot. Using the Fujifilm X-E1 with the XF 18-55 zoom set at 55mm and f 8 and 1/7th of a second exposure. It was in a shaded area that was dark so I used ISO 1600 which on the early 16 mega pixel Fujifilm cameras was still noise free! I’ve made this image into a 3′ X 3′ Crystal Archive print and it is stunningly sharp!
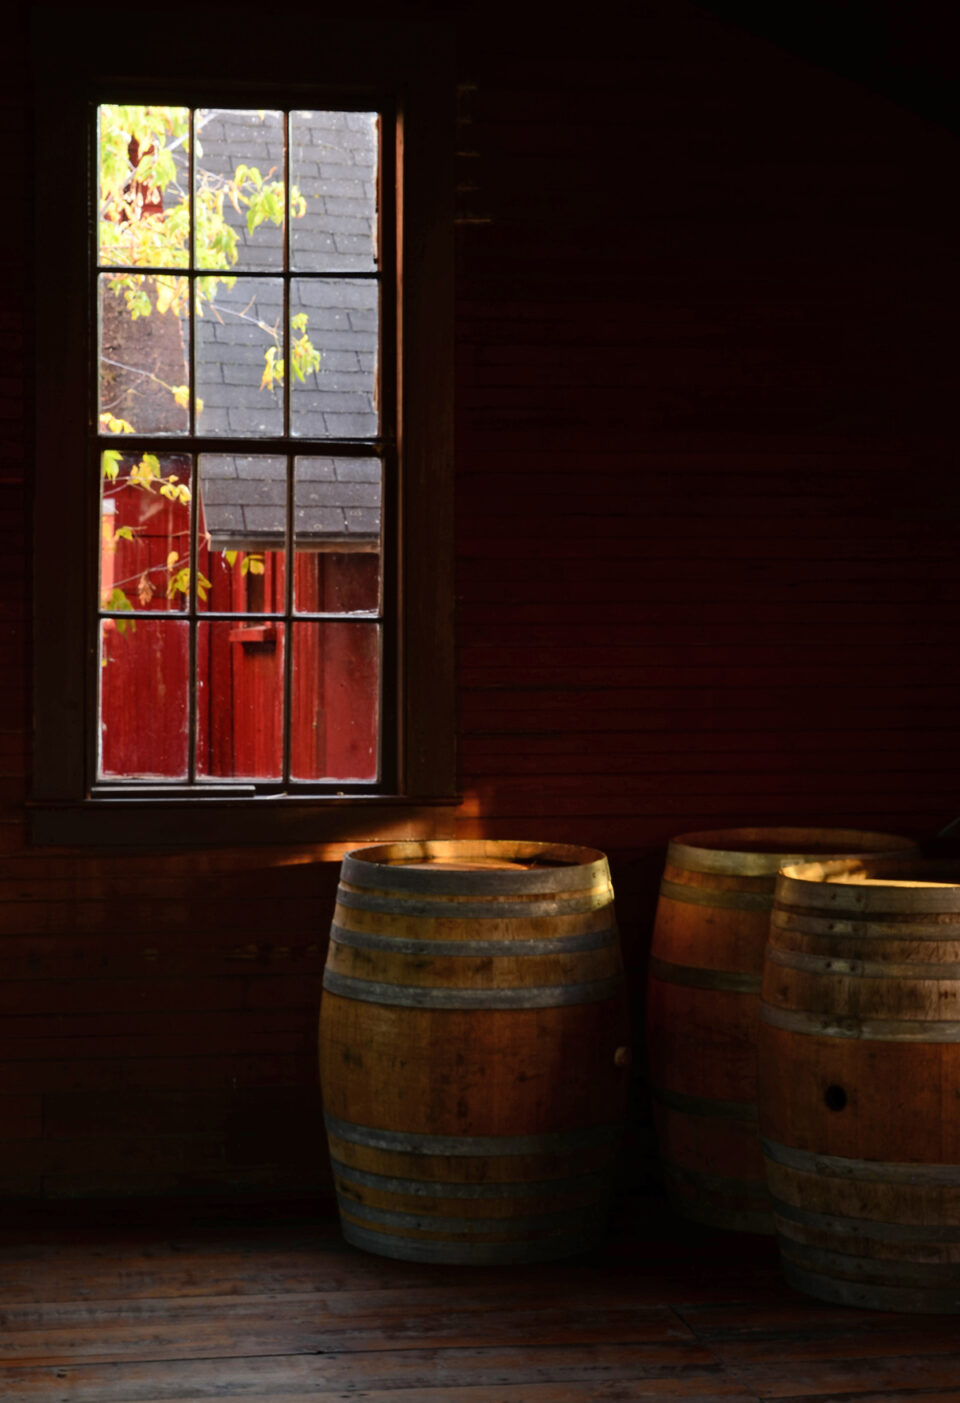
Image Number 4: On a photo trip with some His Light Workshop friends we were shooting on a small farm in New Hampshire and I found this scene. The window light was lighting the barrels perfectly and the fall color and red building through the window added a nice touch. I used a Nikon D7000 with the 24mm to 120mm lens set at 44mm and an aperture setting of f 11 and a shutter speed of 2.5 seconds. A sturdy tripod was used, of course. Using a tripod slows you down and helps you work your compositions, carefully!

Image Number 5: I love to shoot in antiques shops and I found this military uniform with medals and loved the color and texture. I used my Fujifilm X-T2 and the XF 60mm macro lens, set to F 5.6 and a shutter speed of 1/2 second @ ISO 200. I used a small LED light panel to throw light on the medals. A F stop of 5.6 allowed the background to go soft.
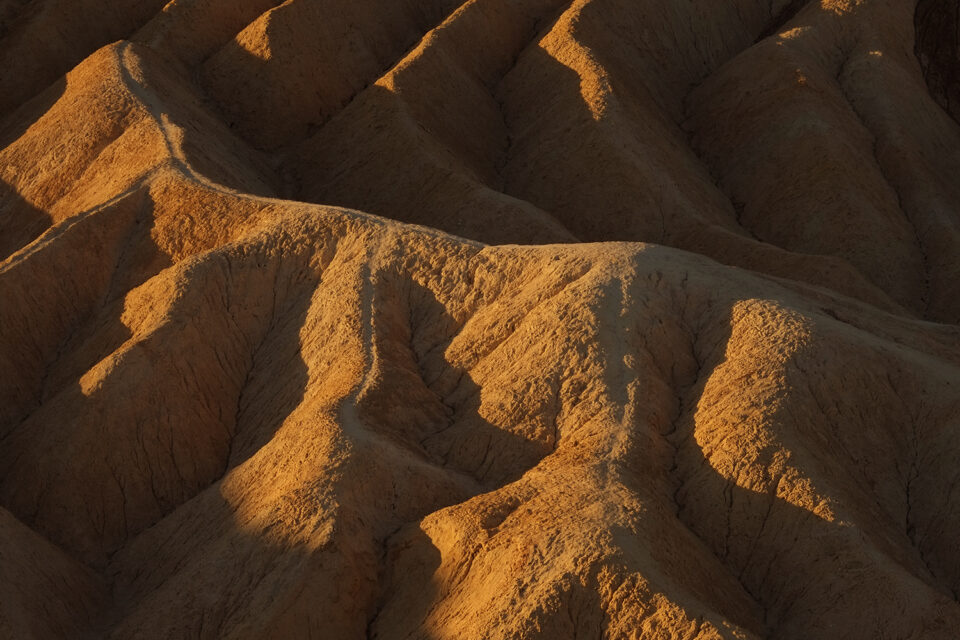
Image Number 6: While shooting in Death Valley at Zabriskie Point, I loved these lines across the sand ridges. Using a Fujifilm X-Pro 1 and the XF 55-200 at 95mm and a f stop of f 11 and a shutter speed of 1/30th of a second @ ISO of 200, the late afternoon light revealed the texture and the paths going into the distance.
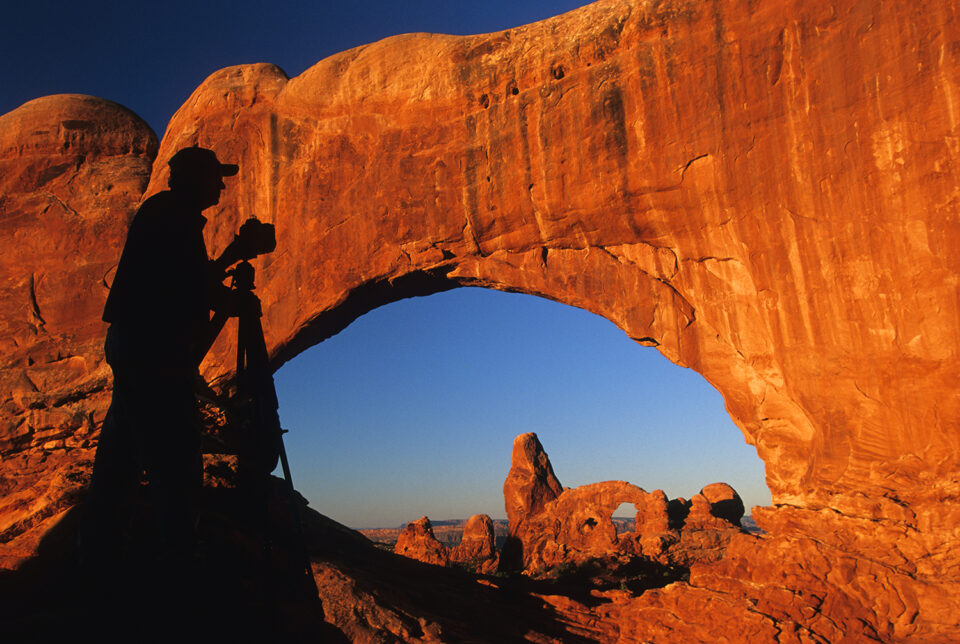
Image Number 7: Teaching a workshop in Arches National Par several of us went through North Window to capture the spectacular light show that happens on a clear morning at sunrise. The late Dr. Charles Stanley climbed onto the rock face to make the shot and his silhouette was perfect for my shot. Charles loved the shot and had a 4′ X 6′ foot print made to hang behind his desk at In Touch, I was honored! I used the Fujifilm X-T3 with the XF 18-55 zoom set at 18mm and f 11 @ 1/3oth of a second at ISO 200. At F11 I had great depth-of-field through out the entire frame.
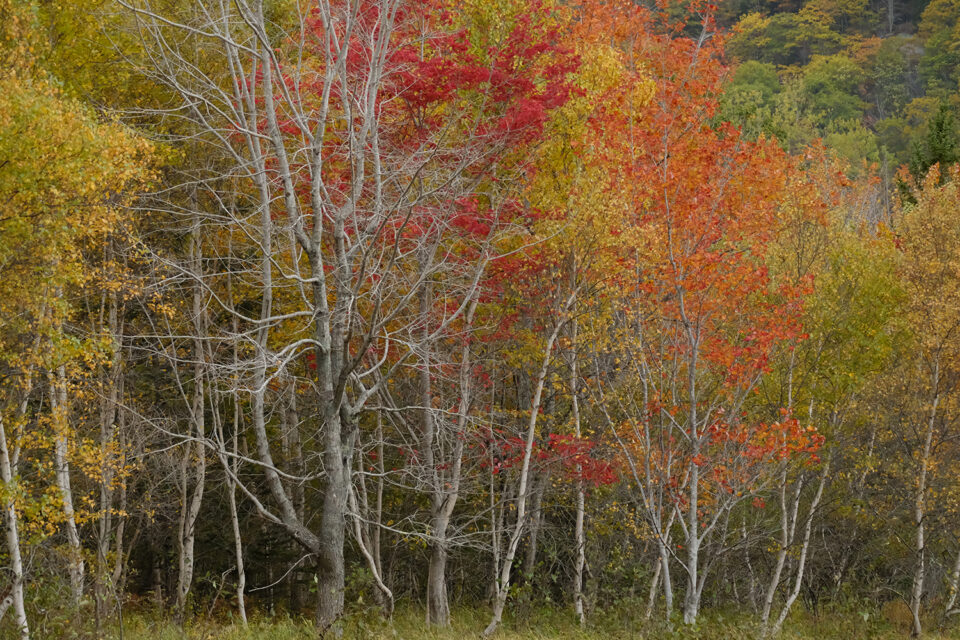
Image Number 8: Fall in Acadia National Park is one of my favorite locations, this particular year the color was fantastic! One of my favorite lenses for doing the intimate landscape is the XF 100-400 zoom on this day with help of a polarizer to deepen the color i shot with my Fujifilm X-H1 and set the lens at f 5 .6 and a shutter speed of 1/250th of a second @ ISO 400. The bare tree in the foreground against the great color behind it was really appealing to me!
I hope that gives you some insight to how I approached and made some of these images!
Blessings,
the pilgrim
This entry was posted on Tuesday, June 27th, 2023 at 2:40 pm
You can follow any responses to this entry through the RSS 2.0 feed.
All good stuff for everyone to know…. What’s interesting ( as we talked about on the phone this morning) is that all these items that we all consider, unlike the PRE-FILGHTCHECKLIST THAT PILOTS REVIEW EVERY FLIGHT, we do all these things, and perhaps even more, by rote, or second nature. After so many images and so many years we’ve trained ourselves to think creatively. Learning to think creatively come with time and in the end isn’t that complicated. I wrote about this extensively in my 2 articles “A Path the Creativity”. You can all read them here. https://jackgrahamphoto.com/2021/07/28/the-path-to-creativity-part-2/
Getting “good” ( what ever that means!) is a function of time…What Bill has written is SO important. It’s what makes photographs special and photographers happy with their work!–Thanks William!–JG
I’ve watched you do all of this, over and over and your images show it !!!!!
I read somewhere that Fuji said that all X-T lenses are designed to be most accurate across the whole spectrum at F8 (GF lenses F5.6.) Does this f-stop play into any of your decision-making process when you go to make an image?
Technically that is mostly correct, the vast majority of lenses will yield the best results two to three stops down from wide open. So a f 2.8 lens is optimum at f 8. Some very expensive long telephoto lenses like the Nikon’s 600mm f 4 are optimized to be best wide open at f 4, since they are most often shot wide open. I don’t worry about the small differences, I use the f stop that gives me the depth-of-field I need for the image rather than try to shoot at the best performing aperture setting. Well corrected lenses, of which Fujifilm’s are among the best, are sharp enough at all settings, even defraction at f 22is not severe enough that I avoid it if I need more depth! Hope that helps!
I need to print this out as reread it every time I go out shooting. Looking at the images and your captions, there’s more of a lesson in each of the images than you wrote.
Thanks David, that was my hope!